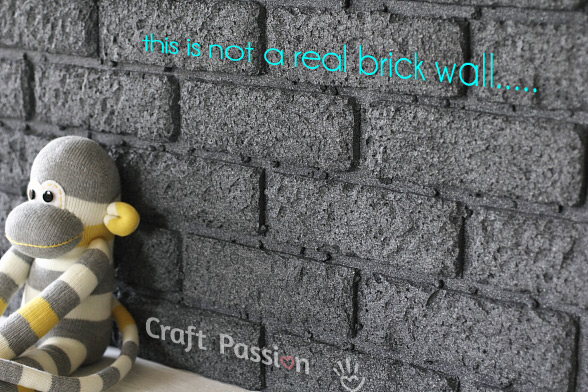
DIY Faux Brick Wall Panel
Tools & Materials:
1. Polystyrene Foam / Styrofoam, 1/2″ thick, 2′ x 4′
2. Wooden panel, 2 1/2′ x 4′
3. Primer (aerosol), Brand: Krylon, color: Gray [buy at Amazon.com]
4. “Make It Stone!” texture paint, Brand: Krylon, color: Black Granite [buy at Amazon.com]
5. Polystyrene Foam cutter
6. Wood glue / PV Glue / White Glue
7. Sponge applicator
8. Soldering iron/soldering gun (removable tip)
9. Pen & ruler
10. Old newspapers
Note:
Choose similar primer coat to suit your texture paint topcoat.
Please read instructions on the can/tin before using paint spraying.
 Mark 2 1/2″ x 8″ on the polystyrene foam with pen and ruler.
Cut them out with the cutter, don’t have to be very straight.
Mark the brick spacings on the wooden panel, about 3/8″ apart.
 Apply glue on both panel and polystyrene foam.
Glue the brick foams on the panel.
Try no to let the glue touches the upper side of the brick foams, it may prevent proper melting with soldering iron.
 Create some stone debris between the gaps by gluing some small broken pieces of polystyrene foams.
 Leave it dry until it is safe to work on. I left it overnight as I wasn’t free to continue the work until the next day.
 When the brick foams have securely adhered to the panel, take out the soldering tip and switch on the soldering iron and let it heat up.
[Remark: I used my workshop’s soldering station with temperature control (I was an Electronic Engineer with lots of hands-on experience)… but you can just use a normal one with a removable tip.]
Melt the brick foams edges with the soldering iron and make them rounded. Lightly touch the foam to make dented holes to faux an aged brick.
Do light damage on the first round, repeat if you want more serious damage.
Warning: the fume generated could be toxic, please do this at well-ventilated room or wear a mask.
 Spray a layer of primer onto the brick foam in a well-ventilated space / outdoor. Remember to place some old newspaper to prevent the paint from staining your floor or table.
See some white spots on the brick foam? They were in fact melted spots due to the primer’s solvent, I didn’t shake it well in the first place. So, do remember to shake the primer well and get them mixed up to prevent this from happening. Luckily the brick was meant to have a damaged look, so I am safe even with the roughness appeared on the melted spots!!! Phew!
 Leave the primer to dry for a few minutes to 1/2 hour or as per the instruction on the label.
Topcoat it with the “Make It Stone!” texture paint. This texture paint is really awesome and works like magic. A quick thin layer makes such a big difference.
The instruction said that it only covers 6 square feet, it actually covers more than that. I used 1 can for 3 coats.
 A closer look on the texture, basically it is like some tiny paint splashes in black, gray and white tone.
 After 3 coats and the faux brick wall panel is completed, leave it to dry until it is safe to handle.
I am more than happy with the result. Perhaps when I get bored of gray, I will repaint it to white using the same “make it stone!” texture paint.


Няма коментари:
Публикуване на коментар